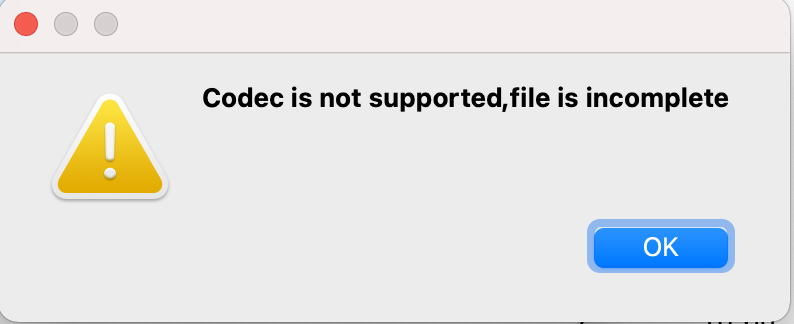
Trying to export audio from Wireshark can be a pain. But if you practice a few habits, it is a lot easier. If you do a lot of network packet capturing and RTP playback using WireShark for quality troubleshooting in the VOIP field, you have came across the dreaded error “Codec is not supported, file is incomplete”.
You probably have also came across trying to play a stream but the stream is blank.
Also, if you are trying to quickly find out what DSCP is doing, or what country IP’s of a PBX are from, using these tricks can be the difference between frustration and or a lot of clicks or smooth sailing.
My Quick VoIP Tips
If you are really fluent and don’t need much direction, below are the things I do as a practice. If you need to learn what this stuff is and how to do it, read more below.
Always separate calls into separate files using prepare filter
Save audio to raw, import with Audacity and convert to mp3
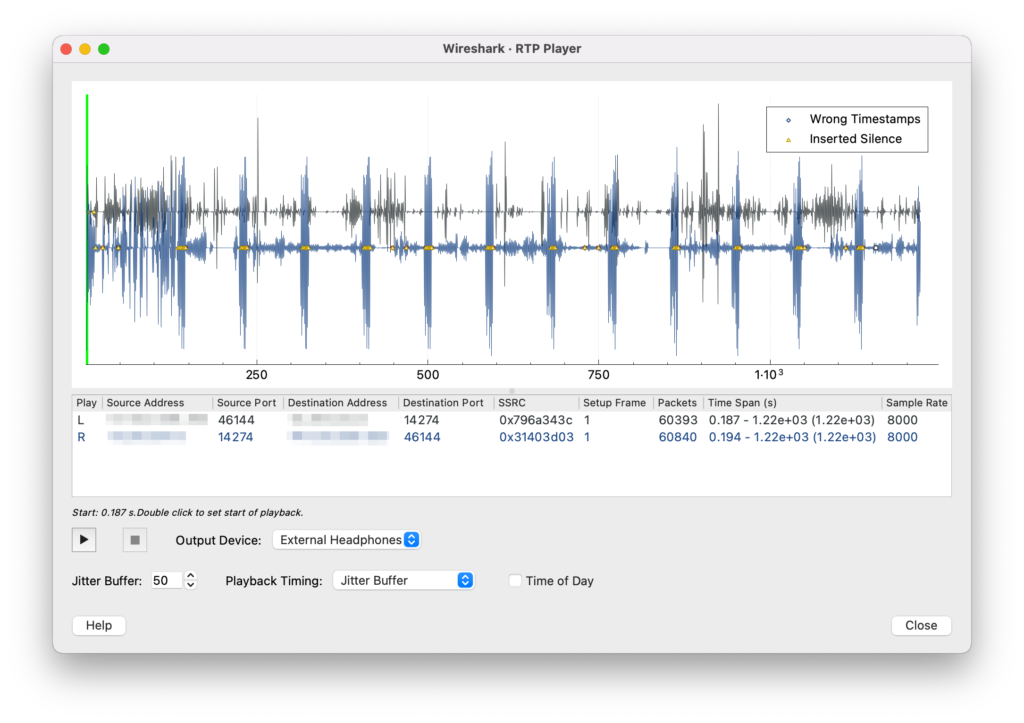
I always separate calls from captures because not only does it make processing packets faster, but you can play streams that just wont even play when you have larger captures. Regardless of computer you are using.
The first image is what you see when you try and play stream on a large capture. Second image is what you see when you have done a prepare filter on the call, export visible, and reopened those exact same packets and clicked play stream again.
If you dont know how to do any of this, Ill walk you through it.
Open your capture, click Telephony >> VoIP Calls
Wait fo the “Recalculating statistics on all packets” to complete. you will see this on the bottom of WireShark.
Now you should see the WireShark – VoIP Calls screen.
Click on the call you want to listen to and click the Prepare Filter button. Wait for Filtering frame number to complete in bottom of WireShark
Go back to the main WireShark screen, click Filter >> ExportSpecified Packets >> All Packets >> Displayed and name and save new file.
Now open the new capture file, go back to Telephony >> VoIP Calls, you will see only one call, and chances are Play Streams will now show you your sound you want to play.
Codec is not supported, file is incomplete
This error from what I suspect has to do with some sort of buffer overflow not handled in WireShark export methods. Probably a memory limit in the programing converting RTP payload to au file type. Regardless of why, there is a trick to avoiding this. Couple simple steps. Without the Trick it is impossible to export long calls to audio.
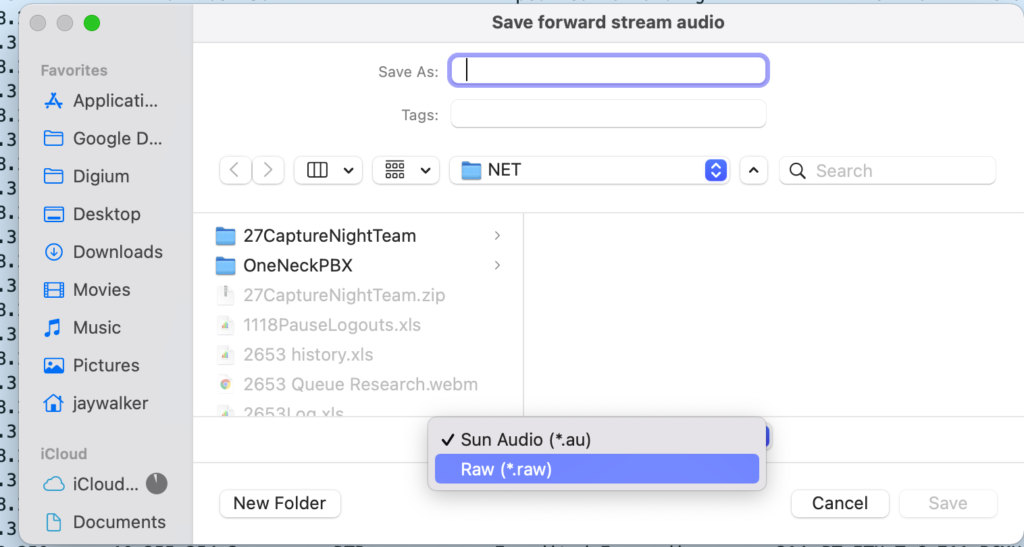
save the forward and reverse as raw
import into Audacity
Set to Stereo left and right
Saving Forward and Reverse to raw
Open call capture in WireShark >> Telephony >> RTP >> RTP Streams
Select both streams and click Analyze
Click Save >> File Synchronized Forward Audio and change format to Raw
Repeat for Reverse Audio
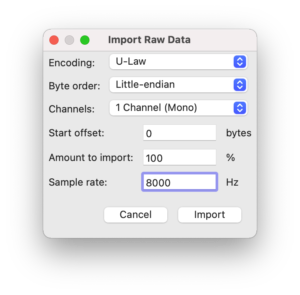
Import Raw Files into Audacity
File >> Import >> Raw Data and select raw file you exported.
Select Encoding >> U-Law, Channels >> 1 Channel (Mono), Sample rate 8000. (These settings may be different for your phone system, these are Switchvox settings)
Import
Repeat for both forward and reverse raw files.
Audacity Import Raw Settings
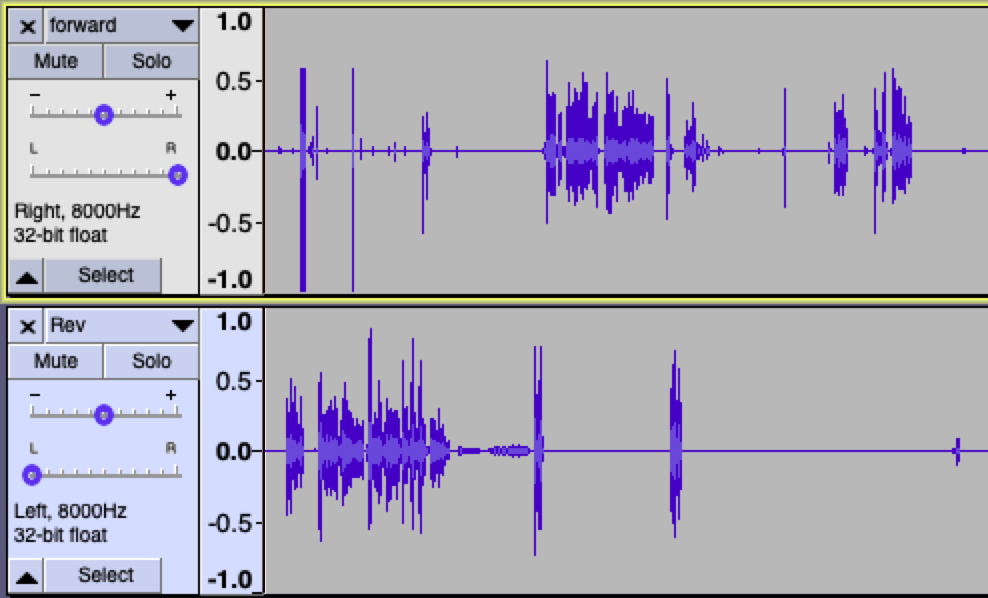
Set Left Right Pan
Finally just drag the sliders for left and right for each audio feed so you can clearly hear both forward and reverse audio.
Setting Forward Reverse Panning
Thats it for now. If I come up with some more tips, I will update this post. It is very likely that I may do something that is a tip to others but to me it’s just SOP. So feel free to ask me or suggest anything.
This neat trick allows you to see the source and destination IP county. At least the country listed in the MaxMind databases. Keep in mind you could have a US IP address say from PureVPN connecting to you, and the user is actually in the country of Bolivia.
There are literally hundreds of thousands of IPs that are owned by VPN companies who will lease out VPN connections so anyone who pays including perps. The actors or perps can now pick and choose where they want to pretend to be from anywhere in the world. Most good hackers will use multiple VPN’s and multiple countries(you know on tv when McGeek say “Its gonna take a while gibs, they are bouncing off routers all over the place”. So you have to go pretty far down the rabbit hole to find the actual source. But this does give you insight into honest folks, and kiddie hackers.
I save my database folder on Google Drive File stream (you can use drive also, but I recommend don’t use the free drive), and mark it as offline. that way if any of my coworkers need to use it also, then can do the same.
Setup Wireshark
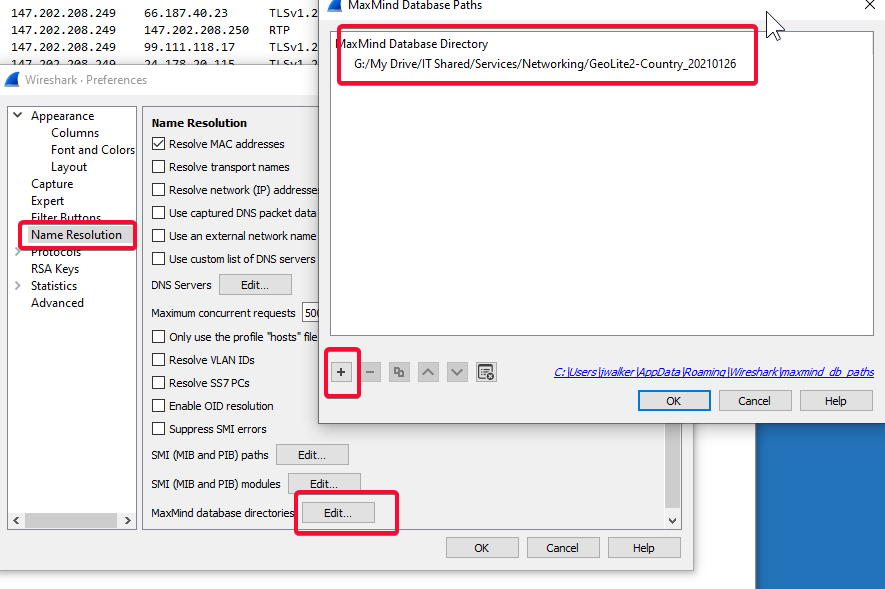
Go to Wireshark >> Edit >> Preference >> Name Resolution and add the MaxMind database folder
Wireshark Preferences for MaxMind
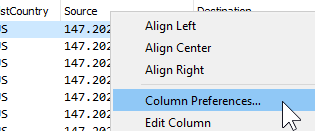
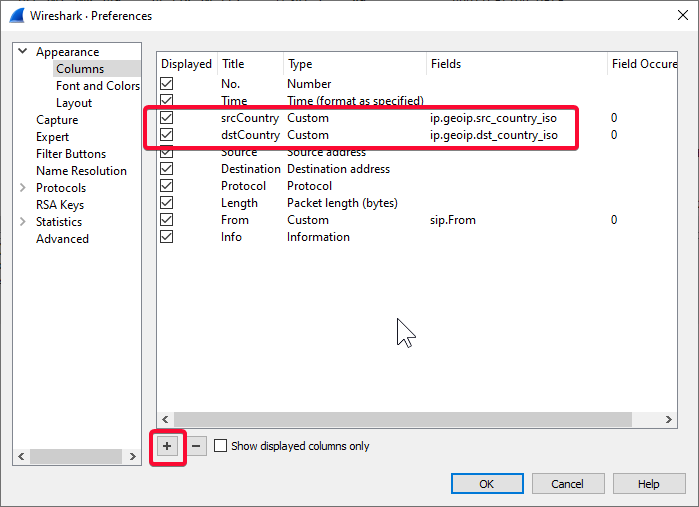
Now right click the Column header and select Column Preferences
Add both columns for the ip.geoip.src_country_iso and ip.geoip.dst_country_iso and drag to the column order you want
How to edit columns in WireSharkSetup Columns in WireShark
Finally you need to restart WireShark for this to take affect. NOTE you can see the countries for public static IP addresses in both live captures and files you newly open up.
Robo-Calls can be
legal or illegal and should be expected from time to time (especially during
the campaign season). And are practically impossible for small to medium
businesses to stop. But you will have some options personally
Illegal Calls
If the call tries to
sell you something and you have not agreed to it.
It’s a private
company working on behalf of charity and you are not allowed to opt out
Legal Calls
Political adds(at
least it’s an honest abuse of power), and information calls like from a school
or pharmacy
Report the call to
the FTC at https://www.donotcall.gov/. record the caller
and any number you are told to call back. This information is not only
investigated if enough reports come in but also reported to a spam call
database that the carriers and other call blocking solutions use. This blocks a
lot of calls before they even get to us.
You
also can find a list of call-blocking apps for mobile SmartPhones at ctia.org, a website for the U.S. wireless communications industry.
The site lists apps specific to Android, BlackBerry, iOS (Apple).
NOTE: Small
businesses don’t have many options to block these calls except encourage
reporting so our carriers can improve blocking
Make sure you have Openssl install on your Mac/PC/Linux
open terminal prompt, and navigate to your key folder
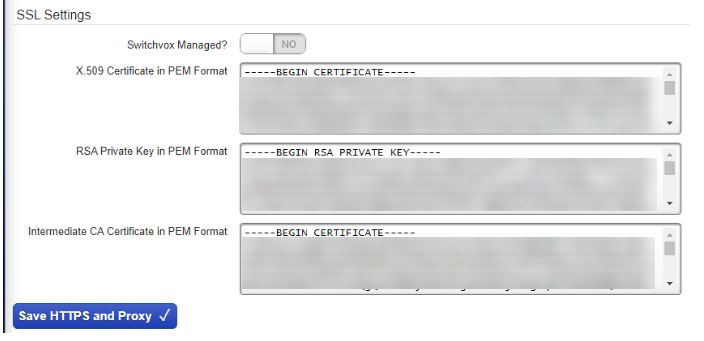
run “openssl rsa -in private.key -text > private.pem”
Open the new pem file, and copy only the rsa portal and past into the private key section of the Switchvox
NOTE: erroneous error will display if your server IP address is local IP, and if you have other phone network IP addresses which are not public IP address which is registered with the certificate
If an SSL certificate blocks your web access, make sure you have accepted the certificate in your browser, or try using a different browser.
Make sure that the certificate matches the hostname on the Switchvox server (go to Server > IP Configuration > Advanced Options > Hostname (and Jabber Hostname can be the same as the Hostname).
Check under Server > Phone Networks and make sure the Host Address has the hostname there, not the IP Address of the server.
RESET SSL from Server Console
From the appliance, plug a VGA monitor and a USB keyboard into the Switchvox server. There are a few things you can do to restore service from the text menu.
Unblock local IPs
Restore Web Admin Access
Reset HTTPS certificate only IF the certificate you created and installed is still not working.